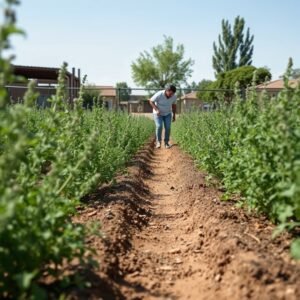
How to Pinch Basil Tips to Make the Plant Bushy

If you want a lush, productive herb garden, learning how to pinch basil is the single most important skill you can pick up. Pinching controls the plant’s shape, delays flowering, and doubles — sometimes triples — the amount of usable leaf you harvest. Done consistently, it turns a leggy, one-stem seedling into a wide, bushy powerhouse that keeps giving from late spring right through the first frost. This guide walks you through every stage of the process, from spotting the right growth nodes to storing your harvest, so you get it right from day one.
Table of Contents
What You’ll Need
- A healthy basil plant (at least 6 inches tall with 3–4 sets of leaves)
- Clean, sharp scissors or pruning snips
- Your fingernails (genuinely the best tool for quick pinching)
- A small jar or glass of water for storing cut stems
- Optional: a spray bottle with water to mist the plant after pruning
- Optional: a balanced liquid fertilizer for potted plants
Step 1: Understand Why You Need to Know how to pinch basil
Basil is what botanists call a sympodial plant — every time you remove the growing tip, the plant redirects its energy into the two lateral buds sitting just below the cut. Those buds each become a new branch, and each of those branches can be pinched again. The result is exponential branching. One stem becomes two, two become four, four become eight. That geometric logic is exactly why mastering how to pinch basil matters so much.
Without pinching, basil rushes toward its biological goal: flowering and setting seed. Once a plant flowers — or “bolts” — the leaves shrink, turn bitter, and the plant starts to die back. Regular pinching disrupts that cycle and keeps the plant in a permanent state of leafy, vegetative growth. Think of yourself as the plant’s editor, constantly redirecting its energy.
This isn’t just theory. Gardeners who pinch consistently can harvest from the same plant for four to five months in a single growing season, while unpinched plants often bolt within six to eight weeks of transplanting.
Step 2: Wait for the Right Plant Size
Timing your first pinch correctly is critical. Start too early — say, when the plant has only two sets of leaves — and you’ll stress a seedling that hasn’t built enough root mass to recover quickly. Wait too long, and the plant is already investing energy in flower production.
The sweet spot is when your basil has produced at least three sets of true leaves and stands roughly 6 inches tall. At that point the root system is established, there’s enough foliage to sustain photosynthesis after the cut, and the plant is genuinely ready to branch out. Most store-bought transplants are at this stage already, which means you can begin learning how to pinch basil almost immediately after bringing one home.
If you’re growing from seed, expect to wait about four to six weeks from germination before that threshold is reached indoors, or slightly faster in a warm outdoor bed with direct sun.
Step 3: Identify the Correct Spot to Pinch
This is where many beginners go wrong. They snip a random section of stem and wonder why the plant doesn’t branch. The secret is pinching just above a leaf node — specifically, just above the pair of leaves where you can already see two tiny buds emerging from the stem.
Look closely at your plant. You’ll notice that at every point where a pair of leaves attaches to the main stem, there are two miniature leaves tucked right into the joint. Those are your lateral buds, and they’re the whole point of the exercise. When you understand how to pinch basil at the node level, you stop guessing and start getting consistent results every single time.
Use your thumb and forefinger to pinch the main stem right above the second or third set of leaves from the top. Squeeze firmly and snap the tip off. The cut should be clean, not ragged — a ragged cut can invite disease. Sharp scissors work too, and are often better for thicker, more mature stems.
According to the University of Illinois Extension, removing the terminal growing tip above a node is the most reliable method for encouraging lateral branching in annual herbs like basil.
Step 4: Remove Flower Buds Immediately
Even with regular pinching, your basil will eventually try to flower. It’s persistent. Knowing how to pinch basil flower buds — not just leaf tips — is the second layer of this skill, and it’s one most casual gardeners skip.
Flower buds appear as a cluster of small, upward-pointing spikes at the top of a stem, usually lighter green and more pointed than regular leaves. The moment you see them, remove the entire flower spike, cutting back to just above the highest healthy pair of leaves below it. Don’t wait a day or two — basil can go from bud to open flower surprisingly fast in warm weather.
Once flowers open and are pollinated, the plant begins converting its resources to seed production. Leaf quality drops noticeably within a week. The Royal Horticultural Society recommends removing flower spikes as soon as they appear and repeating every seven to ten days throughout summer.
Some gardeners allow one or two stems to flower at the very end of the season to collect seed for the following year — that’s a smart move, just do it intentionally and on your terms.
Step 5: Establish a Regular Pinching Schedule
One of the most practical things about learning how to pinch basil is that it fits neatly into a weekly rhythm. Set a rough schedule — say, every seven to ten days — and stick to it. Each session takes no more than three to five minutes per plant.
During each session, walk through these checks in order:
- Look for any flower spikes or buds and remove them first.
- Identify the tallest, most dominant stems and pinch them back to a healthy node.
- Remove any yellowing, damaged, or disease-spotted leaves entirely.
- Step back and assess the overall shape — aim for a rounded, dome-like form rather than a tall, spindly one.
Consistency beats perfection here. A quick once-over every week keeps the plant in check far better than one aggressive pruning session every month. The more regularly you practice how to pinch basil, the more intuitive it becomes, and the more you’ll harvest without even thinking about it.
Step 6: Harvest and Use Your Pinched Stems
Here’s the genuinely satisfying part: every pinch is a harvest. Don’t discard those stem tips — they’re packed with flavour and often include the youngest, most aromatic leaves on the plant. A basil plant maintained with the technique you’re learning when you study how to pinch basil can produce a small handful of usable leaves every single week.
Use fresh pinched stems immediately or store them correctly. The two best short-term storage methods are:
- Counter jar: Place stems in an inch of room-temperature water, cover loosely with a plastic bag, and keep on the counter (not the fridge — cold damages basil). Leaves stay fresh for up to a week.
- Oil or butter blend: Blend fresh leaves with olive oil, pour into an ice cube tray, and freeze. Each cube is a ready-to-use flavour boost for soups, pasta, or sauces.
For longer storage, the National Center for Home Food Preservation recommends blanching basil briefly before freezing to preserve its colour and prevent enzymatic browning.
If you’re growing basil in a container on a desk or windowsill, you’re already treating your workspace like a small productive garden — a mindset not unlike optimising other corners of your life for efficiency. Much like finding the right tools, like a best standing desk for small spaces, the right setup makes the habit easy to maintain.
Step 7: Keep the Plant Healthy Between Pinches
Knowing how to pinch basil is only half the equation. A plant that’s stressed by poor watering, low light, or nutrient deficiency won’t branch vigorously no matter how perfectly you pinch. So the week between sessions matters just as much as the pinch itself.
Here are the non-negotiable care basics that keep a pinched plant thriving:
- Light: Basil needs a minimum of 6 hours of direct sun per day. Less than that and the new lateral branches will be weak and leggy. A south-facing windowsill or grow light works well indoors.
- Water: Water deeply but infrequently, allowing the top inch of soil to dry out between waterings. Soggy soil invites fusarium wilt, a fungal disease that can kill a plant in days.
- Fertiliser: For potted basil, a half-strength balanced liquid fertiliser every two to three weeks during the growing season keeps the plant productive. In-ground plants in amended soil often need less.
- Temperature: Basil is cold-sensitive. Anything below 50°F (10°C) slows growth and darkens the leaves. Bring pots inside if a cool night is forecast.
When you combine attentive care with a consistent pinching habit, you’re giving your basil every reason to stay in its vegetative, leaf-producing phase as long as possible. That’s the whole goal of learning how to pinch basil — not just technique, but a sustainable routine.
Common Mistakes to Avoid
- Pinching too low: Cutting back to the very base of the plant removes all leaf area and can shock it badly. Always leave at least two sets of healthy leaves on every stem.
- Skipping the flower buds: The most common reason basil turns bitter is an unnoticed flower spike. Check the centre of each stem cluster every visit.
- Irregular pinching: Going two or three weeks without checking your plant lets it race ahead toward bolting. Once it flowers fully, reversing the damage is very difficult.
- Using blunt tools: Dull scissors crush rather than cut the stem, leaving ragged tissue that can brown and become an entry point for pathogens. Keep your tools sharp.
- Pinching in the evening before a cold night: Fresh cuts need a few hours of warmth to callous over. Pinch in the morning so the plant has the warmest part of the day to recover.
- Only pinching the top: A fully rounded plant needs shaping all over. Check the side branches too — any that are racing ahead of the rest should be pinched back to keep the dome shape.
- Overwatering after pinching: It feels nurturing, but soggy soil after a prune is stressful. Keep to your normal watering schedule.
how to pinch basil: Quick-Reference Summary
| Step | Action | Frequency |
|---|---|---|
| 1 | Understand the branching logic | Once (foundational knowledge) |
| 2 | Wait for plant to reach 6 inches / 3 leaf sets | One-time milestone |
| 3 | Pinch above the second or third node from the top | Weekly |
| 4 | Remove flower buds as soon as they appear | Every 7–10 days |
| 5 | Establish a consistent pinching schedule | Ongoing |
| 6 | Use or store pinched stems immediately | Every pinch session |
| 7 | Maintain light, water, and feed between pinches | Ongoing |
Final Thoughts
Mastering how to pinch basil is one of those garden skills that pays you back far beyond the effort it requires. Spend five minutes a week, and you’ll keep a single plant productive for an entire season. You’ll harvest more, waste less, and never be stuck with a bolt-heavy, bitter plant wondering what went wrong.
The fundamentals are simple: pinch above a node, remove flower spikes promptly, stay consistent, and keep the plant healthy in between sessions. Every time you practice how to pinch basil, the technique becomes more instinctive. Before long you’ll be doing it by feel — a quick look, a firm pinch, and back to whatever you were doing.
Start today. If your basil plant is sitting in a pot right now and has three or more sets of leaves, you have everything you need to take that first pinch. Your future self — the one stirring pesto into pasta in August — will be glad you did. And if you’re the type who enjoys optimising your routines and tools, don’t stop here — check out our roundup of the best robot vacuum for pet hair for another easy win around the house.
Growing herbs is one of those small, consistent habits that quietly improves daily life. Keep the pinches coming, and your basil will keep giving back.
Frequently Asked Questions
How often should I pinch my basil plant?
A good rule of thumb is every seven to ten days during the active growing season. That cadence keeps new growth from racing toward flowering and ensures you’re always harvesting from a plant in peak vegetative condition. If you miss a week, just pick up where you left off — one skipped session won’t ruin the plant.
Can I pinch basil all the way back to the soil?
No — that would remove all photosynthetic surface area and almost certainly kill the plant. When practising how to pinch basil, always leave at least two healthy pairs of leaves on every stem so the plant can continue to produce energy and push out new growth from the remaining nodes.
What do I do if my basil has already flowered?
Remove all flower spikes immediately and cut each affected stem back to a healthy leaf node below the flower cluster. The plant can often recover, though the remaining leaves may be slightly more bitter than pre-flower leaves. Going forward, a consistent pinching schedule will prevent the situation from recurring.
Does it matter what time of day I pinch basil?
Morning is best. The plant is well-hydrated from overnight, temperatures are cooler, and it has the entire warm day ahead to begin callusing over fresh cuts. Avoid pinching in the evening before a cold night — chilly temperatures slow the healing process and can leave fresh cuts vulnerable to moisture and disease.