How to Set Up a Hydroponic Herb Kit Step by Step
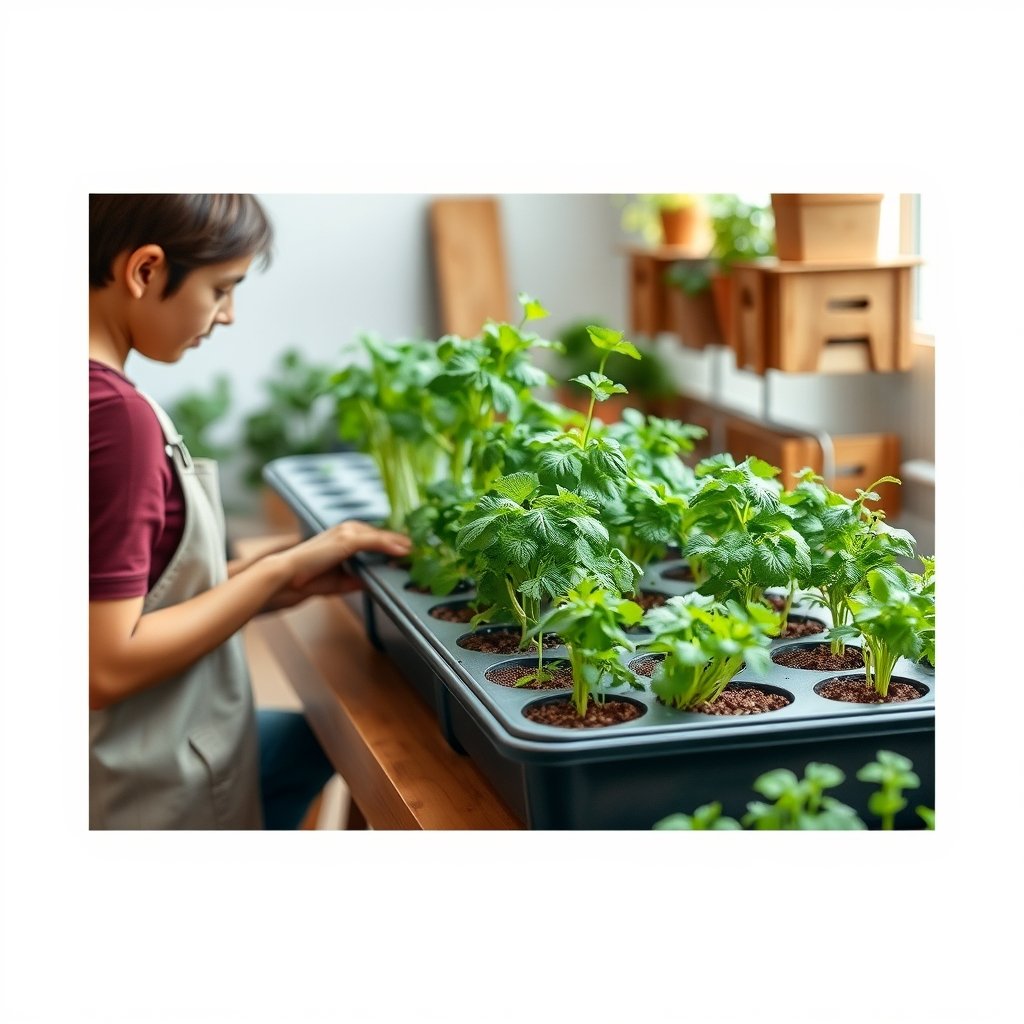
When you decide to set up hydroponic herb kit at home, you’re choosing one of the fastest and cleanest ways to grow fresh herbs indoors year-round. No muddy pots, no outdoor garden space, and no waiting for the right season.
A countertop hydroponic system feeds plant roots directly with a nutrient-rich water solution, which means herbs like basil, mint, cilantro, and parsley can grow up to twice as fast as they would in soil. Whether you’re a complete beginner or someone who’s killed every potted herb they’ve ever owned, this guide will walk you through every step with practical, honest advice.
Table of Contents
What You’ll Need Before You Set Up Hydroponic Herb Kit
- A hydroponic herb kit — countertop models such as a Kratky-style reservoir, a wick system, or a powered pump system all work well for herbs.
- Net pots — small plastic cups with slotted sides that hold your growing medium.
- Growing medium — clay pebbles (hydroton), rockwool cubes, or perlite. These anchor the roots and allow water and air to flow freely.
- Hydroponic nutrient solution — a liquid or powder concentrate formulated specifically for hydroponics (general-purpose potting fertilizer won’t cut it).
- Seeds or seedlings — basil, mint, chives, parsley, cilantro, and thyme are all excellent starter herbs.
- A grow light — most kitchen windowsills don’t provide enough light. A full-spectrum LED grow light is the most reliable option. See our detailed guide on how to set up a grow light for indoor basil for setup tips that apply to all leafy herbs.
- A pH meter or pH test strips — hydroponic plants are sensitive to water pH. You’ll want to keep it between 5.5 and 6.5.
- pH up and pH down solutions — simple liquid additives to correct your water’s pH.
- A measuring cup and syringe — for accurate nutrient mixing.
- A timer (for pump systems) — to automate your water cycle.
- Clean tap or filtered water — let tap water sit for 30 minutes to off-gas chlorine, or use a filter.
Step 1: Choose the Right Hydroponic System for Your Space
Before you set up hydroponic herb kit components, you need to pick a system that actually fits your lifestyle. There are three types most beginners choose from, and each one has a genuinely different maintenance rhythm.
Kratky (passive, no pump): The simplest option. You fill a reservoir, suspend roots above the water level, and let the plants drink as the water drops. No electricity for the water — just your grow light. It’s perfect for someone who wants near-zero fuss.
Wick system: A felt or cotton wick draws water from a reservoir up to the growing medium. Also passive, slightly slower growing than Kratky, but very forgiving for beginners.
Deep Water Culture (DWC) with air pump: Roots are submerged in oxygenated water at all times. An air stone and pump keep oxygen levels high. This is the fastest-growing method and what most commercial countertop kits (like AeroGarden-style systems) use. It requires a bit more setup but produces noticeably lush results.
We recommend starting with a DWC-style kit or a passive Kratky setup, depending on how hands-on you want to be. Either way, when you set up hydroponic herb kit correctly, the system does most of the heavy lifting for you.
Step 2: Rinse and Prepare Your Growing Medium
This step gets skipped too often, and it causes problems later. If you’re using clay pebbles, rinse them thoroughly in a colander under running water until the water runs clear. Clay pebbles often carry dust that can clog your system or alter pH.
If you’re using rockwool cubes, soak them in pH-adjusted water (around 5.5) for about an hour before use. Rockwool is naturally alkaline straight out of the package, which can lock out nutrients from your seedlings right from the start.
Perlite doesn’t need soaking, but a quick rinse removes any fine particles. Once your growing medium is rinsed and ready, place it loosely into your net pots — don’t pack it down tight, because roots need space and airflow to thrive when you set up hydroponic herb kit correctly.
Step 3: Mix Your Nutrient Solution
This is where beginners often feel most nervous, but it’s genuinely straightforward once you understand the basics. To set up hydroponic herb kit nutrients properly, always start with clean water in your reservoir, then add your liquid or powdered nutrient concentrate according to the manufacturer’s dosage instructions.
For herbs, use roughly half to three-quarters of the recommended strength, especially for young seedlings. Herbs are lighter feeders than fruiting plants like tomatoes or peppers, and a too-strong solution will burn tender roots.
After mixing, check the Electrical Conductivity (EC) if your kit includes a meter. For leafy herbs, an EC of around 1.0–1.6 mS/cm is a safe range. Then check your pH. Aim for 5.5–6.5, with 6.0 being a reliable sweet spot. Adjust up or down with your pH solutions, adding a few drops at a time and re-checking.
Step 4: Plant Your Seeds or Seedlings
Now it’s time to actually plant. If you’re starting from seed, press one or two seeds into the top of each net pot, gently nestling them into the growing medium. Don’t bury them too deep — 3–5 mm below the surface is enough. Mist the top of the medium lightly with water each day until germination, which typically takes 5–10 days depending on the herb.
If you’re transplanting seedlings from soil, gently wash all soil from the roots under lukewarm water. Be patient and thorough — even small amounts of soil can introduce pathogens and mess up your nutrient solution. Once roots are clean, lower the seedling into the net pot and fill around it with your prepared growing medium.
When you set up hydroponic herb kit with multiple plant sites, stagger your herbs by growth speed. Put fast growers like basil and mint at opposite ends of the reservoir so they don’t crowd slower herbs like parsley or thyme early on. Harvesting basil leaves correctly from the start will also help the plant branch out rather than bolt upward.
Step 5: Set Up Your Grow Light Properly
Lighting is the single biggest factor most beginners underestimate when they set up hydroponic herb kit indoors. Most herbs need 14–16 hours of light per day to grow vigorously — that’s more than even a south-facing window can reliably provide in most climates, especially in autumn and winter.
A full-spectrum LED grow light is the best choice for countertop herb gardens. Look for one that covers your full growing area evenly, not just the centre. Position it so the light sits 15–30 cm above the tops of your herbs, adjusting higher as plants grow taller.
Plug your grow light into a mechanical or smart outlet timer and set it for a consistent daily cycle — for example, on at 7 AM and off at 10 PM. Consistency matters more than perfection. Plants build their internal rhythms around a reliable light schedule, and irregular lighting leads to slower growth and early bolting in herbs like basil. For more specific advice, our guide on setting up a grow light for indoor basil covers wattage, distance, and spectrum in useful detail.
Step 6: Monitor and Maintain Your Water Level
Once you set up hydroponic herb kit and plants are growing, the most important ongoing task is watching the water level in your reservoir. This is where the Kratky method and DWC differ meaningfully.
In a Kratky system, the air gap between the water surface and the bottom of the net pot is intentional and essential. As plants drink, that gap grows and their roots develop an upper “air root” zone and a lower “water root” zone. Don’t top the reservoir back up to the very top — leave that gap intact.
In a DWC or pump system, the reservoir should be kept at a consistent level. Top it up with plain pH-adjusted water (without nutrients) when the level drops by about 10–15%, then add a small nutrient top-up every 7–10 days. A full reservoir change every 2–3 weeks keeps the solution fresh and prevents nutrient imbalances from building up.
Check pH every 2–3 days, especially in the first month while plants are actively growing. Roots absorb different nutrients at different rates, which naturally shifts pH over time. Keeping it between 5.5 and 6.5 consistently is more important than hitting any single exact number.
Step 7: Watch for Early Problems and Fix Them Fast
Even when you set up hydroponic herb kit by the book, small issues can appear. The good news is that hydroponic systems make problems easy to spot early, because you’re watching your plants daily and the variables are simple.
Yellowing lower leaves usually signal a nitrogen deficiency. Check your nutrient solution strength and pH — if pH is off, even a well-mixed solution can’t be absorbed properly.
Slimy or brown roots are a sign of root rot, typically caused by light leaking into the reservoir (algae growth) or poor oxygen levels. Cover any translucent parts of your reservoir with opaque tape or a cover, and increase aeration if you’re running a DWC system.
Leggy, stretched stems mean your grow light is too far away or not powerful enough. Lower it by 5 cm at a time until growth tightens up.
Wilting despite water being present often points to root rot or a pump failure in DWC systems. Check your air stone and pump connections first.
Catching these issues in the first week or two makes a huge difference. The moment you set up hydroponic herb kit and plug it in, check it daily — ten seconds of observation each morning saves hours of troubleshooting later. If you’re growing basil and notice it starting to flower prematurely, our guide on how to stop basil from flowering indoors explains exactly what to do.
Step 8: Harvest Your Herbs the Right Way
This is the most rewarding part of the whole process, and doing it correctly actually encourages faster, bushier regrowth. When you set up hydroponic herb kit and reach harvesting stage — usually 3–5 weeks after germination for most herbs — resist the urge to just strip leaves off the bottom of the plant.
Instead, snip stems from the top, just above a leaf node (the point where two leaves branch out). This signals the plant to grow two new shoots from that point, doubling its branching over time. For basil specifically, always harvest from the top third of the plant and never remove more than one-third of the total plant at one time.
Herbs like mint and chives can be harvested more aggressively — cut mint stems back to about 5 cm above the base and it’ll regrow vigorously within a week. Parsley and cilantro should be harvested from the outside stems first, working inward.
If you find yourself with a bumper crop, don’t let it go to waste. Learning how to dry basil leaves at home is a great way to preserve your harvest for months without losing much flavour.
Consistent harvesting is one of the best-kept secrets of hydroponic herb growing. The more you harvest (within reason), the more the plant produces. It’s a genuinely satisfying feedback loop once you get it going.
Common Mistakes to Avoid When You Set Up Hydroponic Herb Kit
- Skipping pH checks. This is the number-one cause of underperforming hydroponic herbs. You can have the perfect nutrient mix, but if pH is outside the 5.5–6.5 range, your plants simply can’t absorb it.
- Using full-strength nutrients for seedlings. Always start at half strength and scale up once plants are established at around 3–4 weeks old.
- Letting light reach the reservoir. Light in the water triggers algae growth, which competes with your herbs for nutrients and clogs roots. Keep your reservoir covered and opaque at all times.
- Mixing incompatible herbs together. Mint is incredibly aggressive and will dominate a shared reservoir. Give it its own container or pair it only with other fast, vigorous growers.
- Overcrowding plant sites. It’s tempting to fill every pod when you set up hydroponic herb kit for the first time, but crowded plants compete for light and airflow. Leave some pods empty if your light can’t cover all of them evenly.
- Ignoring water temperature. Nutrient solution between 18°C and 22°C is ideal. Warmer water holds less oxygen and encourages root rot; cooler water slows growth noticeably.
- Never changing the reservoir. Topping up is not the same as changing. Do a full reservoir flush and refill every 2–3 weeks to prevent nutrient salt buildup and bacterial growth.
- Harvesting too aggressively too early. Let seedlings establish for at least 3 weeks before any significant harvesting. Young roots aren’t ready to support heavy leaf production yet.
How to Set Up Hydroponic Herb Kit for Long-Term Success
Getting through the first harvest is satisfying, but the real goal is a system that keeps producing week after week. When you set up hydroponic herb kit with long-term consistency in mind, a few habits make a significant difference.
Keep a simple notebook or phone note tracking your pH readings, nutrient changes, and any issues you notice. It takes 30 seconds per check and gives you invaluable reference data if problems arise later. You’ll quickly start to see patterns — maybe your pH always drifts up by day 3, or one particular plant site always underperforms.
Clean your system thoroughly between growing cycles. Empty the reservoir completely, rinse all components with a dilute hydrogen peroxide solution (3% concentration works well), and let everything air dry before refilling. This prevents biofilm and pathogen buildup that accumulates invisibly over time.
Consider staggering your plantings so you always have herbs at different growth stages. Plant a new set of basil seeds every 3–4 weeks so that as one batch matures and gets harvested down, a younger batch is already coming up behind it. This is how you go from occasional fresh herbs to a genuinely constant supply.
Hydroponic growing is also a great entry point into understanding plant nutrition more broadly. Resources from the University of Maryland Extension on hydroponics provide solid, science-based information on nutrient management that applies directly to home herb setups. For anyone curious about how the science behind the method works, the overview of hydroponics research on ScienceDirect is a trustworthy deep read. And the Clemson University Cooperative Extension guide to hydroponics offers practical home-grower advice backed by university research.
The more you learn about why each step works, the more confidently you’ll be able to adapt when something unexpected happens. And something unexpected always happens eventually — that’s just gardening, hydroponic or not.
Which Herbs Work Best When You Set Up Hydroponic Herb Kit
Not every herb thrives equally in a hydroponic setup, and knowing which ones to prioritise when you set up hydroponic herb kit makes your first experience much more rewarding.
| Herb | Growth Speed | Difficulty | Best System | Notes |
|---|---|---|---|---|
| Basil | Fast (3–4 weeks to harvest) | Easy | DWC, Kratky | Needs warmth (above 18°C) and good light |
| Mint | Very fast | Very Easy | Any | Keep separate — it spreads aggressively |
| Chives | Moderate (4–5 weeks) | Easy | Kratky, Wick | Tolerates lower light better than basil |
| Parsley | Slow (6–8 weeks) | Moderate | DWC, Kratky | Slow to germinate — be patient |
| Cilantro | Moderate | Moderate | Kratky | Bolts quickly in heat — keep cool |
| Thyme | Slow | Moderate | Wick, Kratky | Prefers slightly drier conditions — don’t over-water |
| Lettuce (bonus) | Very fast (3 weeks) | Very Easy | Any | Technically not an herb, but ideal for beginners |
Basil and mint are our top recommendation for anyone who wants quick, visible wins when they first set up hydroponic herb kit. Both grow fast enough that you’ll feel the momentum carrying you forward into caring for the system consistently.
Final Thoughts
Learning to set up hydroponic herb kit properly takes an afternoon the first time, and then it becomes second nature within a few weeks. The key is understanding that you’re not replacing gardening intuition with a machine — you’re just removing the variables of weather, soil quality, and seasonal light. The fundamentals remain the same: give plants the right nutrition, light, and growing conditions, and they’ll reward you generously.
Start simple. Pick one or two herbs you actually cook with. Use a passive Kratky system if the idea of a pump feels like too much to manage. Get your pH right from day one. Then harvest early and often. Those four things alone will take you from first-time grower to confident hydroponic herb gardener faster than you’d expect.
If you want to go deeper into the world of indoor growing, our beginner’s guide to what hydroponics means in the kitchen covers the method from a food-first perspective — a great complement to the technical steps in this guide. When you set up hydroponic herb kit and start pulling fresh herbs off a living plant minutes before cooking, you’ll understand why so many home cooks never go back to shop-bought bunches.
Frequently Asked Questions
How long does it take to set up hydroponic herb kit for the first time?
The physical setup — assembling the reservoir, rinsing the growing medium, mixing the nutrient solution, and positioning your grow light — typically takes 1–2 hours for a beginner. First germination usually appears within 5–10 days. Most herbs reach their first full harvest within 3–5 weeks of sprouting.
Do I need a pump to set up hydroponic herb kit at home?
No. Passive systems like Kratky and wick setups require no pump and no electricity for water circulation. A pump-based DWC system grows herbs faster because of better oxygenation, but it adds cost and a small amount of noise. Either approach works well — choose based on your budget and how hands-on you want to be.
How often should I change the water when I set up hydroponic herb kit?
Do a full reservoir change every 2–3 weeks. Between changes, top up with plain pH-adjusted water as the level drops, and add a small amount of nutrient solution every 7–10 days to compensate for what the plants have consumed. Regular changes prevent salt buildup and keep your solution balanced.
Can I set up hydroponic herb kit without a grow light?
Technically yes, but practically speaking, results are usually disappointing without supplemental light indoors. Most herbs need 14–16 hours of light per day, and a typical window — even a bright south-facing one — rarely provides that consistently, especially in autumn and winter. A basic LED grow light is a worthwhile investment for anyone serious about getting real yields.